Mapping a network drive in Windows 10 or 11 allows you to access shared folders or files on a network as if they were local drives on your computer. This is particularly useful for improving productivity in office environments or managing home networks.
This guide provides a clear step-by-step process for mapping network drives, troubleshooting issues, and ensuring a seamless experience.
What Is a Network Drive?
A network drive is a shared folder or storage device that is hosted on a network. By mapping a network drive, you can assign it a drive letter (e.g., “Z:”) and access it directly from File Explorer, just like your local drives.
Why Map a Network Drive?
Mapping a network drive offers several benefits:
- Centralized Access: Easily access shared resources from one location.
- Improved Workflow: Quickly open and save files without searching for network paths.
- Enhanced Collaboration: Share files with team members seamlessly.
- Persistent Connections: Reconnect to shared folders automatically after restarting your computer.
Steps to Map a Network Drive in Windows 10 and 11

Follow these simple steps to map a network drive on your Windows 10 or 11 computer:
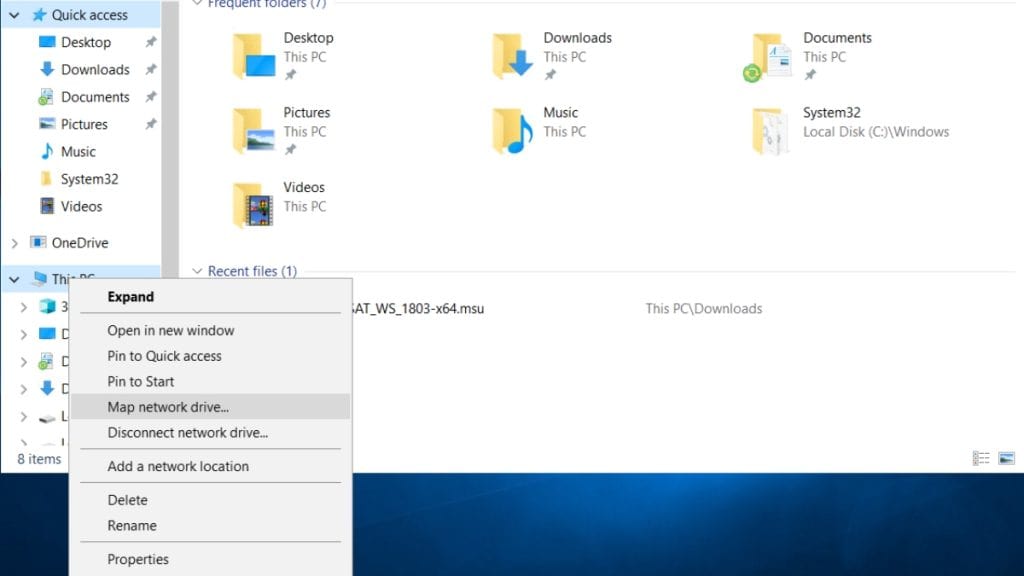
Step 1: Open File Explorer
- Press Windows Key + E to open File Explorer.
- Click This PC from the left-hand menu.
Step 2: Select “Map Network Drive”
- In the ribbon menu at the top, click on the “Map Network Drive” button.
- A dropdown menu will appear—select “Map Network Drive.”
Step 3: Assign Drive Letter and Network Path
- Choose a drive letter (e.g., “Z:”) from the dropdown menu.
- In the Folder field, type the network path of the shared folder (e.g.,
\\ServerName\SharedFolder). - If you’re unsure of the network path, ask the administrator or use the Browse button to locate it.
Step 4: Enable Additional Options
- Check the box for “Reconnect at sign-in” if you want the drive to remain mapped after rebooting.
- Check “Connect using different credentials” if the shared folder requires a username and password.
Step 5: Enter Network Credentials (If Required)
- If prompted, enter the username and password provided by your network administrator.
- Click OK to complete the connection.
Step 6: Access Your Mapped Drive
- The mapped network drive will now appear under This PC in File Explorer.
- Double-click the drive to access its contents.
Troubleshooting Common Issues
If you encounter problems while mapping a network drive, try these solutions:
- Network Drive Not Appearing: Ensure the network path is correct and the shared folder is accessible.
- Authentication Issues: Verify that you’re using the correct username and password.
- Network Path Not Found: Check if the network device is powered on and connected to the same network as your computer.
- Drive Disconnects After Reboot: Enable the “Reconnect at sign-in” option during setup to keep the drive mapped persistently.
- Permissions Error: Contact your network administrator to confirm you have access to the shared folder.
Advanced Methods for Mapping Network Drives
For tech-savvy users, you can also map network drives using advanced tools like Command Prompt or PowerShell:
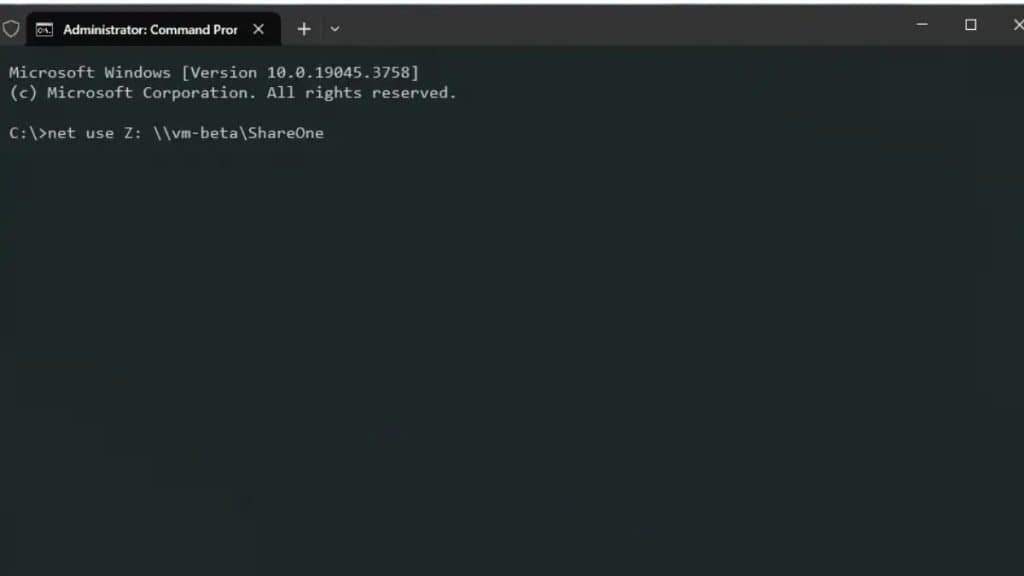
Using Command Prompt

- Open Command Prompt with administrator rights.
- Type the following command and press Enter:net use Z: \\ServerName\SharedFolder /persistent:yes
- Replace
Z:with your preferred drive letter and adjust the network path accordingly.
Using PowerShell
- Open PowerShell with administrator rights.
- Type the following command and press EnterNew-PSDrive -Name “Z” -PSProvider “FileSystem” -Root “\\ServerName\SharedFolder” -Persist
- Customize the drive letter and network path as needed.
Tips for Managing Mapped Drives
- Organize Drive Letters: Assign consistent drive letters for frequently used network drives.
- Create Shortcuts: Add shortcuts to mapped drives on your desktop for quicker access.
- Backup Network Paths: Keep a list of network paths to reconnect easily if needed.
- Monitor Connectivity: Regularly check that the shared folder is accessible to avoid disruptions.
Conclusion
Mapping a network drive in Windows 10 and 11 is a straightforward process that improves file accessibility and collaboration. Whether you use File Explorer, Command Prompt, or PowerShell, the steps above will help you set up and manage network drives with ease.
Have questions or additional tips? Share them in the comments below! If you found this guide helpful, don’t forget to share it with your network for easier file management on Windows.